Our Location
5th Floor, Huake Center, Lanshan District, Linyi City, Shandong Province, China

5th Floor, Huake Center, Lanshan District, Linyi City, Shandong Province, China

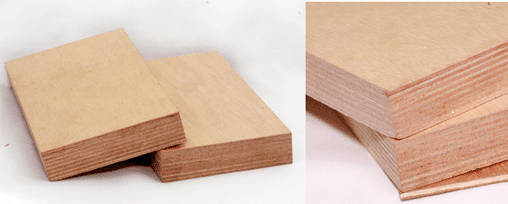
Plywood H trim is a metal or plastic profile shaped like the letter H that joins the edges of two plywood panels, giving the seam a clean finished line while holding the sheets together. Unlike a hidden structural clip, H trim shows as a slim dividing strip between panels, so builders use it on wall cladding, ceilings, partitions, and furniture where the joint should stay visible and neat. This guide explains what plywood H trim is, where it works, how to install it, and how to pick the right size and finish.
When two panel edges meet on a visible surface, the seam either needs hiding or showing on purpose, and H trim is the profile that turns the gap into a deliberate line. The trim grips both panel edges and caps the joint with a clean face strip.
An H trim is an extruded profile whose cross-section looks like the letter H, with two open channels either side of a central web. The two channels take the edges of adjoining panels, and the web shows as a narrow strip between them. The profile joins, aligns, and finishes the seam in one piece.
The two channels of the H each grip a panel edge, while the center web sets the gap and shows as the visible strip. The profile keeps both sheets in the same plane and lets them move together. The cross-section is what separates a visible H trim from a hidden clip.
Aluminium H trim gives a crisp, hard edge that suits architectural and furniture work, while PVC and plastic versions cost less and suit drywall, ceiling, and utility panels. The metal profile resists denting and holds a sharp line. The plastic option bends and trims easily on site.
Aluminium trim comes in silver, black, and anodised tones, while PVC comes in white, grey, and wood-look colours to match a panel face or a room scheme. The finish lets the trim recede or stand out. A matched colour makes the seam disappear into the surface.
| Trim material | Look | Best use |
|---|---|---|
| Anodised aluminium | Crisp metal line | Feature walls, furniture |
| Powder-coated aluminium | Colour matched | Interior cladding |
| Rigid PVC | Clean plastic strip | Ceilings, partitions |
| Flexible plastic | Soft, bendable | Curved joints |
H trim earns its place wherever panel edges show and a neat dividing line is wanted, from wall systems to furniture. The profile suits both interior dry panels and exterior cladding when the material is weather-rated.
On a plywood-lined wall or a partition, H trim caps each vertical seam and gives the surface a panel grid that reads as part of the design. The trim keeps the sheets aligned and hides the raw edges. The cladding looks deliberate rather than unfinished.
Ceiling panels meet at H trim so the seams stay straight overhead and the edges do not sag or open. The profile holds the sheets flush at the ceiling line. The trim makes a paneled ceiling tidy where a raw seam would look rough.
On cabinets, shelving, and display units, H trim turns a panel joint into a crisp metal or plastic line that finishes the piece. The trim protects the exposed edges from handling. The furniture details read polished instead of raw.
Weather-rated aluminium H trim joins exterior plywood or composite cladding panels, protecting the seam from rain while giving the facade a clean grid. The profile sheds water at the joint. The exterior trim needs the right coating to weather.
Installing H trim follows the panel layout, with the trim set in place as each panel goes up so the profile captures both edges. The method is simple and rewards a straight first panel.
The installer cuts the panels square and cleans the edges so the trim channels seat fully. A square, clean edge lets the trim grip evenly along its length. Any fuzz or a ragged edge shows through the narrow channel.
The trim pushes onto the edge of the first fixed panel, with the open channel taking the panel and the web facing out. The installer taps the profile home so it seats along the full edge. The first panel sets the line the rest follow.
The next panel slides into the open channel on the far side of the trim, closing the joint as it lands against its fixing. The trim captures both edges and holds the panels in one plane. The joint closes to a clean visible line.
The panels fasten to the framing as usual, and the trim needs no separate fixing on many systems because the panel edges hold it. Where the trim needs anchoring, a small screw through the web holds it without showing. The seam reads as a finished line once the panel fixings are set.
The right trim matches the panel thickness, the exposure, and the look wanted, and the wrong size leaves a loose or bulging joint. A few checks settle the choice.
The channel width of the H trim must match the panel thickness, so a 12 mm panel takes a 12 mm channel and an 18 mm sheet a wider profile. A mismatched trim rocks or refuses to seat. The thickness match keeps the joint tight and level.
Interior PVC trim suits dry rooms, while exterior work needs anodised or powder-coated aluminium that resists sun and rain. The coating decides how long the exterior trim keeps its finish. The exposure picks the material and the coating.
The buyer matches the trim colour to the panel face or the room scheme so the seam either blends or accents. A wood-look PVC trim mimics a timber edge, while a black metal trim draws a sharp line. The finish sets how the joint reads.
Trim comes in standard lengths and can join end to end where a run is longer, with the joint kept away from the busiest sight line. The supplier’s lengths decide how many pieces a wall needs. Planning the lengths reduces waste and visible joins.
H trim is one of several ways to treat a panel seam, and each method suits a different look and budget. Comparing them helps the buyer pick the right detail.
A shadow gap leaves a recessed slit between panels for a minimalist look, while H trim shows a solid strip joining them. The shadow gap needs precise edges and offers no edge protection. The trim is the practical, protective choice.
Edge banding covers each panel edge separately with a veneer or plastic strip, giving a solid-timber look with no visible joint line, while H trim deliberately shows the seam. Banding suits furniture that should look seamless. The trim suits panel systems that celebrate the grid.
Butting two panels tight with no trim leaves a hairline seam that opens with movement and offers no protection, while the H trim holds the gap and caps the edges. The bare butt joint is quick but fragile. The trim adds the durable finish.
H trim lasts well with light care, and a damaged section can swap out without disturbing the whole wall. The upkeep follows the material.
A damp cloth wipes aluminium and PVC trim clean, and a mild cleaner lifts marks without scratching the coating. Abrasive pads dull an anodised finish. The regular wipe keeps the seam line crisp.
A dented or discoloured trim section releases by easing the panel edge back, and a new length slides in the same way the old one came out. The panel often stays in place during the swap. The seam returns to its finished line with a short length of new trim.
Exterior trim keeps its coating longer with a periodic clean and a check for scratches that expose bare metal. A touch-up pen covers small marks before corrosion starts. The care keeps the facade grid sharp through the seasons.
Buyers ask the same questions about plywood H trim, and these answers cover the ones that come up most often.
H trim joins and finishes the edges of two plywood panels on walls, ceilings, partitions, and furniture, showing a clean strip between sheets while holding them aligned.
A panel clip hides behind the joint for structural edge support, while H trim shows as a visible strip on the surface. The trim finishes the seam, and the clip supports it.
Choose an H trim whose channel matches the 18 mm panel thickness so it seats fully and holds the edges flush. The trim length and spacing follow the run of the seam.
Aluminium gives a crisp, durable edge for architectural and furniture use, while PVC costs less and suits drywall, ceiling, and utility panels. Exterior work needs a coated aluminium profile.
Yes with a weather-rated profile such as anodised or powder-coated aluminium that resists sun and rain. Interior PVC trim belongs only in dry, protected spaces.
Plywood H trim turns an open panel seam into a clean finished line while holding both edges aligned, and it suits walls, ceilings, furniture, and exterior cladding. Match the channel to the panel thickness, choose the material for the exposure, and install it as the sheets go up. For panels that join true and hold a straight seam, a manufacturer such as HYY supplies Commercial Plywood and Melamine Plywood with square edges and consistent thickness ready for H trim layouts.